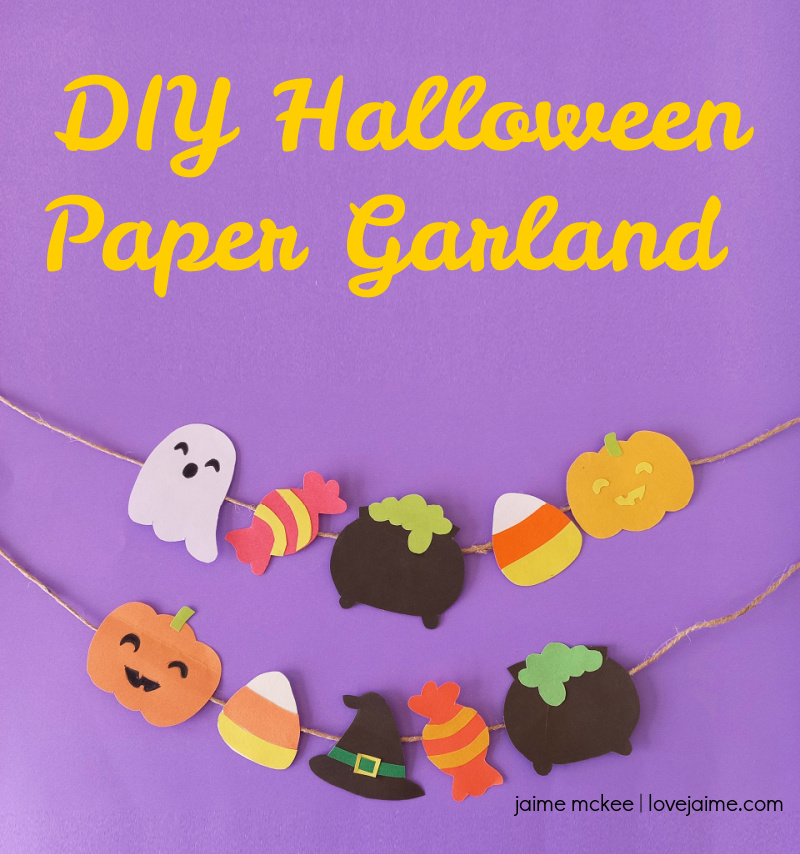
Fall is my favorite season, and Halloween is my husband’s favorite holiday. He loves the scary movies. the costumes, and all the decorations. I’m more interested in the cute side of Halloween (the cute ghosts, candy corn and pumpkin-everything.) This paper Halloween garland can be done with your kids, and it’s a fun way to decorate!
I love the idea of having paper garland decorations in our main living spaces. (Our living and dining rooms are one large area and we could use shorter Halloween garland pieces on shelves.) What’s fun with this pattern is you can make multiples of the different Halloween items and if you don’t like something (maybe you don’t want the candy piece or maybe you’re not into the witch’s hat), you can just leave that out.

I think an all candy corn garland could be fun. Candy corn is my jam! I also like that you (or your child) could make different pumpkin faces. And while I have grand plans to use this in my dining room, I can also envision my kids making a Halloween garland for their bedrooms. They love decorating for any holiday!
Supplies you need to make this paper Halloween garland:
- Assorted colors of construction paper
- Scissors
- Pencil – to trace the template
- Glue (or glue sticks!)
- Sharpie or colored pens (these are my favorite pens!)
- String (I have a large stash of baker’s twine – so many colors!)
- And then download the templates below…
How do you make Halloween garland out of paper?
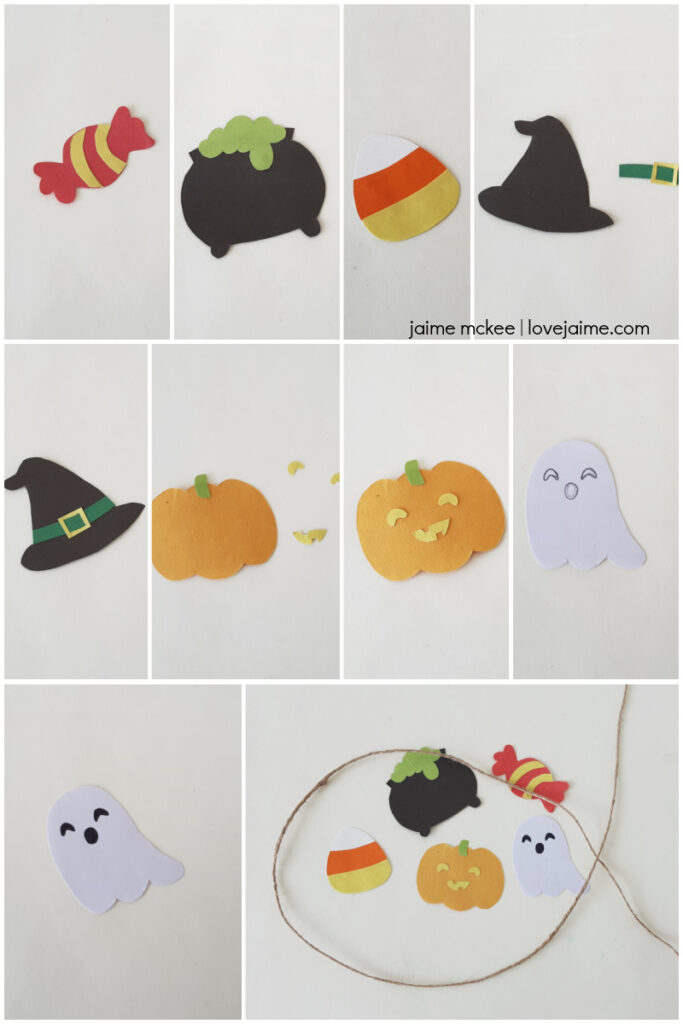
Step one – Choose the colors of paper for your Halloween garland. The template includes a ghost, piece of candy, cauldron, witch’s hat, candy corn and pumpkin. Trace and cut out your patterns.
Step two – Glue the curvy strip cutouts on the candy cutout to make the paper candy.
Step three – Glue the potion cutout on the top side of the cauldron cutout to make the witch’s cauldron.
Step four – Glue the orange and yellow layers of the candy corn to complete the pattern.
Step five – Grab the witch’s hat pieces. Insert the hat strip through the slits of the buckle.
Step six – Glue the strip with the hat cutout to make the witch’s hat.

Step seven – Glue the stem cutout on the top side of the pumpkin.
Step eight – Glue the eyes, nose and mouth cutouts of the pumpkin to make the Jack-o-Lantern.
Step nine – Use a pencil to draw the face of the ghost.
Step ten – Use a sharpie or marker to fill the traced face of the paper ghost.
Step eleven – Select a long piece of string to make the garland. Make sure that the string isn’t tangled.
Step twelve – Attach the paper Halloween items with the string using glue or clear tape. Attach the backside of each item on the string.
Step thirteen – Once you’re done attaching enough Halloween paper items to the string, carefully flip the garland to the right side. Now you can hang it on a wall or use it for another project!


Leave a Reply